How to Add/Remove Columns from a Report
In order to build a specialized report using an existing report for your basis, you must first be able to add and/or remove columns. This article also addresses positioning existing columns or ones you've added.
First you must access the report you want to modify. In this example, navigate to the Employee information report which you would access through the Main Menu. Navigate to Team > My Team > Employee Information.
For this example, the initial report in this company currently has 9 columns as seen below.
Add/Remove Columns:
If you want to create a report that shows the employee ID, First and last name, status and address only, you would need to add a column for the address and Remove the unnecessary columns. You do this by first choosing the lower ellipsis (3 dots) on the right top of the screen. And then choose "Add/Remove Columns" from the drop down box.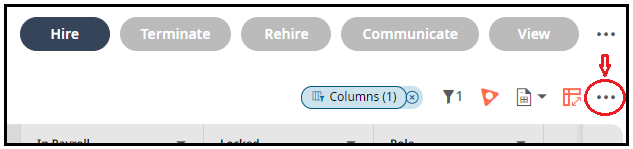
Removing columns: In this example, remove the unnecessary columns first. This is done by choosing the columns you want to remove from the Current Columns side and clicking Remove. If you did not want to add anything at this time you would need to click Apply to activate the change.
Adding Columns: In this example it is for the address field. The easiest way to find what you need is to use the search option in the pop up. Next, choose the column in the Available Columns list and click Add which will move it to the Current Columns side.
Position the column: Anytime you add a column to the Current Columns side, it will appear at the bottom of the list so you would want to choose any column you want to move and use the up or down arrows below the list to move it where you want it. Click Apply once everything is how you want it.